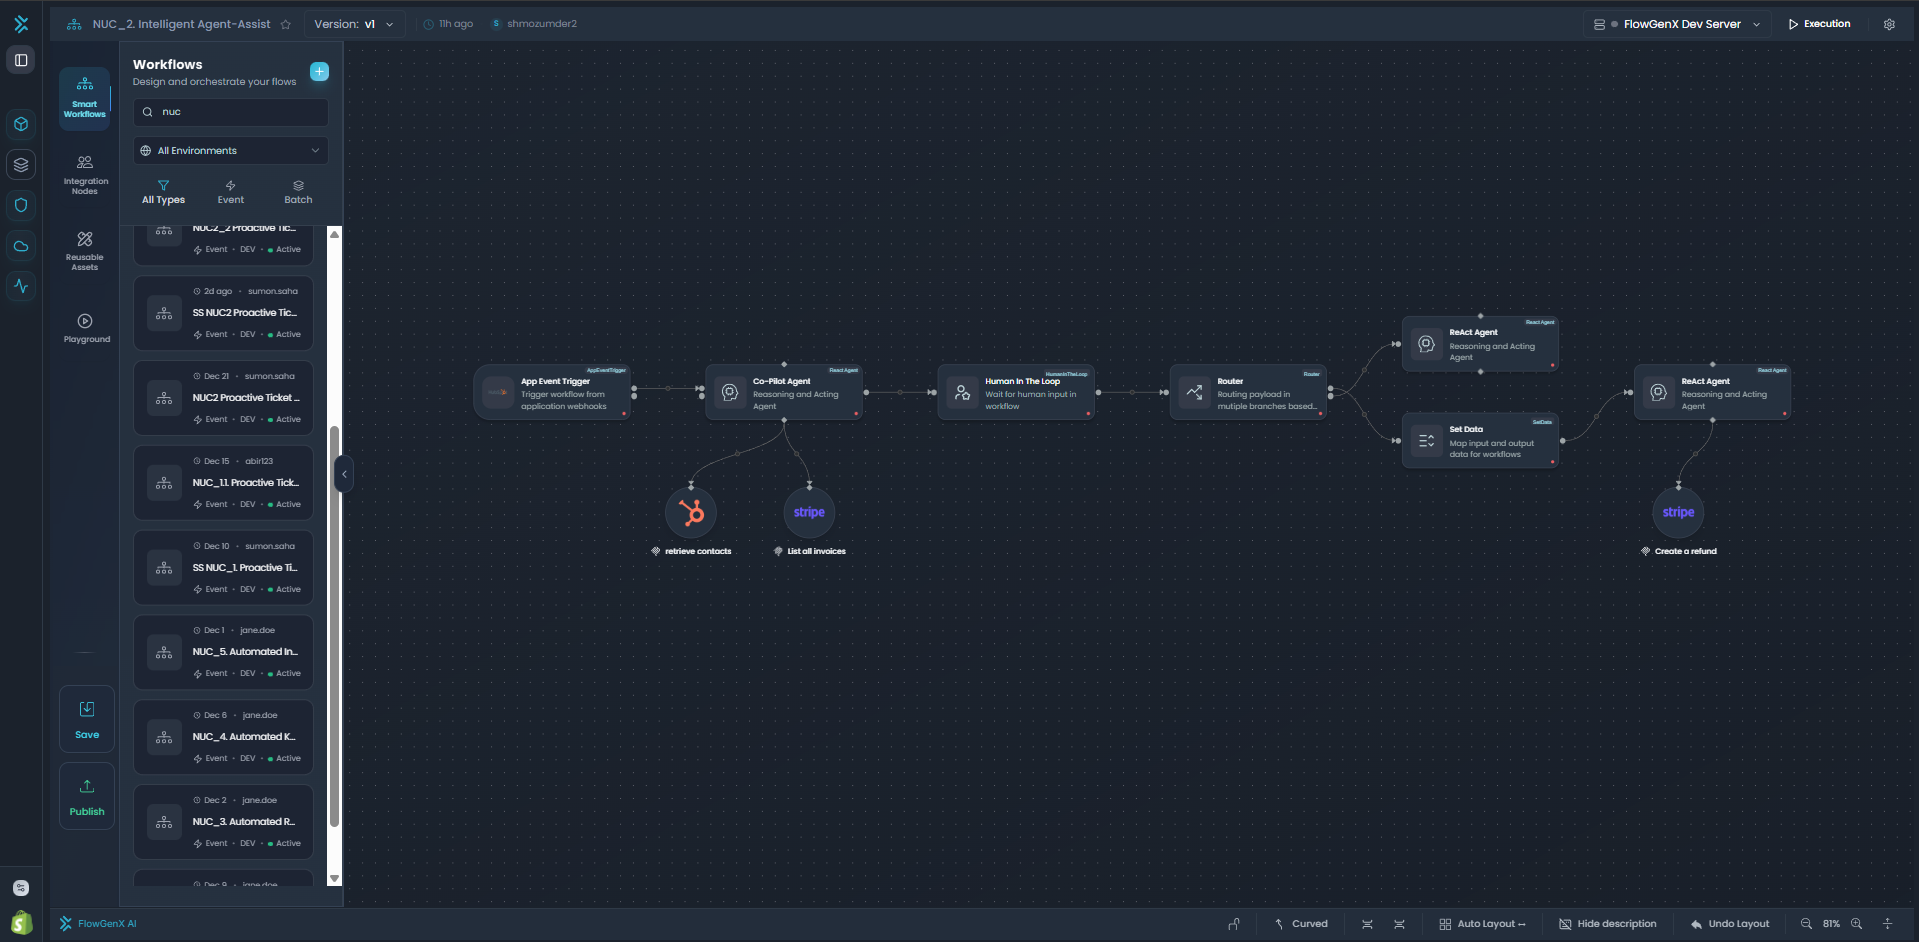
The Workflow Canvas
Visual drag-and-drop editor for designing automation workflows with intelligent auto-layout and real-time execution feedback
The Workflow Canvas is a visual drag-and-drop editor that empowers you to design complex automation workflows without writing code. Build, connect, and organize workflow nodes intuitively while the canvas handles layout, connections, and real-time validation.
Visual Workflow Canvas
Drag-and-drop visual editor for designing automation workflows with intelligent auto-layout
Overview
The Workflow Canvas serves as your primary workspace for building automation workflows. Unlike traditional code-based automation, the canvas provides a visual environment where you can see the entire workflow structure, understand data flow at a glance, and make changes interactively.
Whether you're building a simple three-step process or orchestrating complex parallel executions with conditional branching, the canvas adapts to your needs. It intelligently manages node positioning, connection routing, and viewport state so you can focus on workflow logic rather than visual arrangement.
The canvas integrates seamlessly with FlowGenX's execution engine, providing real-time validation as you build and visual feedback during workflow execution.
Key Features
Intuitive Node Placement
Drag nodes from the palette onto the canvas, position them precisely with grid snapping, and connect them to build your workflow logic visually.
Smart Auto-Layout
Automatically organize your workflow with 3 layout algorithms (ELK.js, Dagre, D3) and customizable spacing controls for clean, readable flows.
Interactive Connections
Draw connections between nodes with hover-activated controls to add intermediate nodes or delete connections on the fly.
Canvas Controls
Lock/unlock canvas for editing, toggle node descriptions, adjust zoom (0.1x-2x), pan freely, and fit entire workflows to viewport with one click.
Special Node Patterns
Work with specialized node pairs like Split/Merge for parallel execution, ForEach/Loop for iterations, and FanOut+Group for complex orchestration.
Viewport Persistence
Canvas automatically remembers your zoom level and position for each workflow, so you always return to where you left off.
Canvas Navigation
Master the canvas controls to navigate efficiently across workflows of any size.
Zooming and Panning
Mouse Controls:
- Zoom: Scroll your mouse wheel up to zoom in, down to zoom out
- Pan: Click and drag the canvas background to move your view
- Zoom Range: Canvas supports 0.1x (10%) to 2x (200%) zoom levels
- Smooth Transitions: All zoom and pan operations animate smoothly
Footer Controls:
The canvas footer provides dedicated controls for precise navigation:
- Zoom In (+): Increase zoom level by 0.2x increments
- Zoom Out (-): Decrease zoom level by 0.2x increments
- Fit View: Automatically center and scale the entire workflow to fit your viewport
- Zoom Display: Shows current zoom percentage (e.g., "75%") in real-time
Fit View Details:
- Padding: 0.2 (20% margin around workflow)
- Maximum Zoom: 1.5x (prevents excessive zoom-in)
- Animation Duration: 800ms for smooth transitions
Viewport Persistence
The canvas intelligently saves your viewport position for each workflow:
- Automatic Saving: Zoom level and pan position stored in browser localStorage
- Per-Workflow: Each workflow remembers its own viewport independently
- Instant Restore: When you reopen a workflow, canvas returns to your last view
- First-Time Load: New workflows automatically fit to view on first open
- Large Workflow Benefits: Essential for navigating complex workflows with dozens of nodes
Viewport Tip
Working on a large workflow? Zoom into specific areas for detailed editing. The canvas remembers your position, so you can switch between workflows and return exactly where you were working.
Working with Nodes
Learn how to add, position, connect, and manage nodes on the canvas.
Adding Nodes to Canvas
The node palette on the left sidebar contains over 50 node types organized by category:
- Open Node Palette: Click the sidebar icon or expand the left panel
- Browse Categories: Explore triggers, actions, logic, data processing, AI, and more
- Drag to Canvas: Click and drag a node from the palette onto the canvas
- Drop to Place: Release the mouse button to place the node at your cursor position
- Auto-Configuration: Node appears on canvas ready for configuration
Node Categories:
- Triggers: Webhook, Scheduler, Manual, HTTP Listener, App Events
- Actions: HTTP Request, Database Operations, API Calls
- Logic: Router, If/Else, Switch, Loop, ForEach
- Data: Transform, Join, Filter, Aggregate, Set Data
- AI/Agents: LLM nodes, Agent nodes, Tool nodes
- Integrations: Human-in-the-Loop, Knowledge Base, External Services
Positioning Nodes
Manual Positioning:
- Click and Drag: Click any node and drag to reposition
- Grid Snapping: Nodes align to invisible grid for clean layouts
- Multi-Select: Hold Ctrl/Cmd and click multiple nodes to move together
- Precise Placement: Position nodes exactly where you want them
Auto-Layout:
Let the canvas organize your workflow automatically:
- Click Auto-Layout button in footer controls
- Select Algorithm:
- ELK.js (Default): Best overall quality, handles complex graphs
- Dagre: Fast, good for hierarchical structures
- D3 Hierarchy: Tree-based, best for sequential flows
- Choose Direction:
- Left-to-Right (LR): Horizontal flow, good for wide screens
- Top-to-Bottom (TB): Vertical flow, good for sequential processes
- Adjust Spacing:
- Use + button to increase spacing between nodes and ranks
- Use - button to decrease spacing for compact layouts
- Apply: Canvas reorganizes workflow into clean, readable layout
Connecting Nodes
Creating Connections:
- Hover Over Source Node: Connection handles appear on node edges
- Click and Drag: Click a handle and drag toward target node
- Drop on Target: Release on target node's handle to create connection
- Connection Appears: Line with directional arrow shows data flow
Interactive Edge Controls:
Hover over any connection to reveal interactive controls:
-
Plus (+) Button: Click to insert a new node between the connection
- Canvas automatically splits the connection
- New node appears in the middle
- Connections rerouted through the new node
-
Delete (Trash) Button: Click to remove the connection
- Disconnects source from target
- Does not delete the nodes themselves
- Some connections are protected (e.g., Split→Merge)
Edge Styles:
Toggle between two visual styles using footer controls:
- Curved Edges: Smooth bezier curves, natural for organic workflows
- Step Edges: Right-angle connections, cleaner for orthogonal layouts
Selecting and Deleting
Selection:
- Single Select: Click any node or connection to select it
- Multi-Select: Hold Ctrl/Cmd and click multiple nodes
- Selection Highlight: Selected items show highlighted border
- Configure Selected: Right panel shows configuration for selected node
Deletion:
- Delete Key: Select node(s), press Delete or Backspace key
- Trash Icon: Click trash icon in right configuration panel
- Confirmation: Some deletions require confirmation to prevent accidents
- Connection Cleanup: Deleting nodes automatically removes their connections
Protected Connections
Some special connections cannot be deleted individually. For example, Split→Merge connections are protected. To remove these, delete the Split or Merge node itself.
Auto-Layout System
The canvas provides three powerful algorithms to automatically organize your workflows into clean, readable layouts.
Available Algorithms
| Algorithm | Best For | Characteristics |
|---|---|---|
| ELK.js (Default) | General-purpose workflows | Balanced spacing, handles complex graphs well, best overall quality, supports hybrid layouts |
| Dagre | Hierarchical flows | Fast rendering, good for tree-like structures, simpler layouts, classic directed graph algorithm |
| D3 Hierarchy | Strict parent-child flows | Tree-based algorithm, best for sequential workflows with clear hierarchy, minimal crossing edges |
Layout Configuration
Direction Options:
Choose how your workflow flows across the canvas:
-
Left-to-Right (LR):
- Horizontal workflow progression
- Source nodes on left, target nodes on right
- Ideal for wide screens and dashboards
- Best for workflows with many parallel paths
-
Top-to-Bottom (TB):
- Vertical workflow progression
- Source nodes at top, target nodes at bottom
- Good for long sequential processes
- Natural reading flow for step-by-step processes
Spacing Controls:
Fine-tune the density of your workflow layout:
-
Rank Separation: Distance between workflow stages/layers
- Default: 200px between ranks
- Increase: More whitespace, easier to read complex flows
- Decrease: Compact layout, more nodes visible at once
-
Node Separation: Distance between nodes in the same rank
- Default: 100px between nodes
- Increase: Clearer individual node visibility
- Decrease: Denser layouts for large workflows
Using Auto-Layout
Step-by-Step Process:
- Build Your Workflow: Add and connect all nodes first
- Click Auto-Layout: Find button in canvas footer
- Select Algorithm: Choose from dropdown (ELK.js recommended)
- Choose Direction: Pick LR or TB based on your workflow type
- Adjust Spacing (Optional): Use +/- buttons to fine-tune density
- Apply Layout: Click apply or algorithm name to execute
- Review Result: Canvas reorganizes nodes automatically
- Fit View: Use Fit View button to center the result
- Fine-Tune Manually: Drag individual nodes if needed
- Lock Canvas: Prevent accidental moves after perfecting layout
Auto-Layout Best Practices
- • Run auto-layout AFTER adding most nodes, not continuously during building
- • Use ELK.js for general workflows - it handles edge cases and complex graphs best
- • Increase spacing before taking screenshots for clearer documentation
- • Lock canvas after layout to prevent accidental node moves during review
- • Save workflow after auto-layout to preserve the organized positions
Special Node Patterns
FlowGenX supports specialized node combinations for advanced workflow orchestration. The canvas provides special handling for these patterns.
Split and Merge Nodes
Purpose: Create parallel execution paths that later rejoin
Canvas Behavior:
- Split Node: Outputs multiple connection handles for parallel paths
- Merge Node: Accepts multiple input handles from parallel branches
- Protected Connections: Direct Split→Merge connections cannot be deleted individually
- Auto-Layout Awareness: Layout algorithms respect parallel paths and keep them organized
- Visual Flow: Clearly shows where workflow branches and where it reconverges
Use Cases:
- Execute multiple API calls in parallel, then aggregate results
- Process different data transformations simultaneously
- Send notifications to multiple channels, wait for all completions
ForEach and Loop Nodes
Purpose: Iterate over collections with loop-back logic
Canvas Behavior:
- Loop Connection: Creates curved path from later node back to earlier node
- Loop Label: Connection displays "Loop" label for clarity
- Special Routing: Auto-layout routes loop connections outside main flow
- Direction-Aware: TB vs LR layouts position loops differently for readability
- Iteration Visualization: Clear visual indication of iteration boundaries
Use Cases:
- Process each item in a list (ForEach over database results)
- Retry operations until success (Loop with conditional exit)
- Batch processing with checkpoints
FanOut with Group Nodes
Purpose: Execute multiple sub-workflows in parallel with visual grouping
Canvas Behavior:
- Group Nodes: Act as visual containers with background styling
- Containment: Nodes can be positioned inside groups
- Auto-Layout Preservation: Layout algorithms maintain group boundaries
- Z-Index Management: Groups appear behind regular nodes (lower z-index)
- Drag-and-Drop: Drag nodes into/out of groups seamlessly
Use Cases:
- Organize related nodes visually (e.g., "Data Processing" group)
- Fan out to multiple parallel sub-processes
- Document workflow sections with visual boundaries
Canvas Controls Reference
Quick reference for all canvas controls and keyboard shortcuts.
Footer Controls
| Control | Function | Notes |
|---|---|---|
| Lock/Unlock | Prevent or allow node editing and movement | Lock canvas during review to prevent accidental changes |
| Edge Type | Toggle between curved and step connections | Curved for organic flows, Step for orthogonal layouts |
| Auto-Layout | Open layout algorithm menu | Choose algorithm, direction, and spacing |
| Spacing (+/-) | Adjust node and rank spacing | Increase for clarity, decrease for compact layouts |
| Zoom In (+) | Increase zoom level by 0.2x increments | Maximum zoom: 2x (200%) |
| Zoom Out (-) | Decrease zoom level by 0.2x increments | Minimum zoom: 0.1x (10%) |
| Fit View | Center and scale entire workflow to viewport | Animated with 800ms transition, max zoom 1.5x |
| Show/Hide Description | Toggle node description labels visibility | Hide for clean view, show for detailed editing |
Keyboard Shortcuts
| Shortcut | Action |
|---|---|
| Delete or Backspace | Delete selected node(s) or connection(s) |
| Ctrl/Cmd + Click | Multi-select nodes (add to selection) |
| Scroll Wheel | Zoom in (scroll up) or zoom out (scroll down) |
| Click + Drag (background) | Pan canvas to navigate |
| Click + Drag (node) | Move selected node(s) |
Best Practices
Canvas Organization
- Name Nodes Descriptively: Use clear, meaningful names that explain each node's purpose
- Use Auto-Layout Early: Establish clean structure with auto-layout, then fine-tune manually if needed
- Lock Canvas When Reviewing: Prevent accidental node movement during debugging or demonstrations
- Group Related Nodes: Use Group nodes to visually organize logical sections of your workflow
- Maintain Consistent Direction: Choose either LR or TB for the entire workflow; avoid mixing directions
Working with Large Workflows
- Use Fit View Frequently: Quickly navigate to see the entire workflow structure
- Increase Spacing for Screenshots: Before documenting workflows, increase spacing for clearer visual communication
- Leverage Viewport Persistence: Zoom into specific areas for detailed editing; canvas remembers your position when you return
- Show/Hide Descriptions Strategically: Hide node descriptions for clean overview, show for detailed configuration work
Connection Management
- Use Step Edges for Orthogonal Layouts: Better alignment when using TB or LR auto-layouts
- Use Curved Edges for Organic Flows: More natural appearance for complex branching and merging
- Hover Before Deleting: Always verify which connection you're removing by hovering to see highlighted path
- Use + Button to Insert Nodes: Cleaner than manually disconnecting and reconnecting; let the canvas handle rerouting
Performance Tips
- Lock Canvas When Not Editing: Reduces computational overhead on very large workflows
- Minimize Node Description Visibility: Faster rendering when descriptions are hidden
- Save After Major Layout Changes: Preserves your organization work and updates viewport persistence
- Use Auto-Layout for Initial Organization: Faster than manually positioning dozens of nodes
Common Workflows
Example 1: Simple Linear Workflow
Structure:
Manual Trigger → Fetch Data → Transform Data → Send EmailCanvas Configuration:
- Layout: LR (left-to-right) for clear progression
- Edge Type: Curved for smooth flow
- Spacing: Default (minimal)
- Lock: Yes (after layout to prevent changes)
Best For: Simple automation tasks, data pipelines, notification workflows
Example 2: Conditional Branching
Structure:
Webhook Trigger → Validate Data → Decision (Router/If-Else)
  ├─ Approved Path → Process Order → Send Confirmation
  └─ Rejected Path → Log Error → Send Alert
Both paths → Merge → Update Dashboard
Canvas Configuration:
- Layout: TB (top-to-bottom) works well for binary decisions
- Use Router or If/Else node for branching
- Use Split/Merge pattern if paths run in parallel
- Spacing: Increase rank separation for visual clarity
Best For: Approval workflows, validation processes, conditional routing
Example 3: Parallel Processing
Structure:
Trigger → Split
  ├─ Process Dataset A → Transform A
  ├─ Process Dataset B → Transform B
  └─ Process Dataset C → Transform C
All paths → Merge → Aggregate Results → Store
Canvas Configuration:
- Layout: LR with increased node separation
- Must use Split/Merge nodes (not Router)
- Edge Type: Curved to show parallel paths clearly
- Use Fit View to see all parallel branches at once
Best For: Batch processing, parallel API calls, multi-source data aggregation
Troubleshooting
| Issue | Possible Cause | Solution |
|---|---|---|
| Can't move nodes | Canvas is locked | Click the lock icon in footer to unlock canvas for editing |
| Nodes overlap after auto-layout | Spacing settings too small for workflow complexity | Increase rank and node separation using +/- buttons, then re-run auto-layout |
| Connection won't delete | Protected Split→Merge edge | Delete the entire Split or Merge node instead of the connection |
| Zoom level too extreme | Accidental scroll wheel zoom | Use Fit View button to reset viewport, or use manual zoom controls (+/- buttons) |
| Viewport resets on page refresh | Browser cleared localStorage or incognito mode | Viewport will save again after next zoom/pan interaction; avoid incognito mode for consistent experience |
| Can't see edge controls (+ and trash) | Mouse hover not detected on edge | Move mouse slowly over the center of the connection line; controls appear on hover |
| Auto-layout disrupted my manual positioning | Auto-layout recalculates all node positions | Manually reposition nodes to restore preferred layout, or save before running auto-layout |
Next Steps
Explore related documentation to master workflow development:
- Node Library - Browse all 50+ available node types and their capabilities
- Human-in-the-Loop - Add human approval steps to your workflows
- Working with Data - Learn expressions, data mapping, and transformations
- Debugging and Testing - Test workflows and trace execution flow