OpenAPI Spec to MCP Servers
Import OpenAPI/Swagger specifications to automatically generate MCP tools
API Workspace enable you to import any OpenAPI/Swagger specification and automatically convert them into MCP tools. Import specs from the API Workspace or upload directly—this is the fastest way to make your APIs accessible to AI agents without writing any code.
Any OpenAPI Spec to Tools
Import from API Workspace or upload specs directly to generate MCP tools
Supported Specifications
FlowGenX supports multiple API specification formats:
OpenAPI 3.0+
JSON or YAML format
Swagger 2.0
Legacy API specs
Postman Collections
Via conversion
Complete Workflow: OpenAPI to MCP Server
Create MCP servers directly from OpenAPI specifications in just a few steps:
Simple 3-Step Process
Create server → Paste OpenAPI spec → Auto-generate tools
Step-by-Step Guide
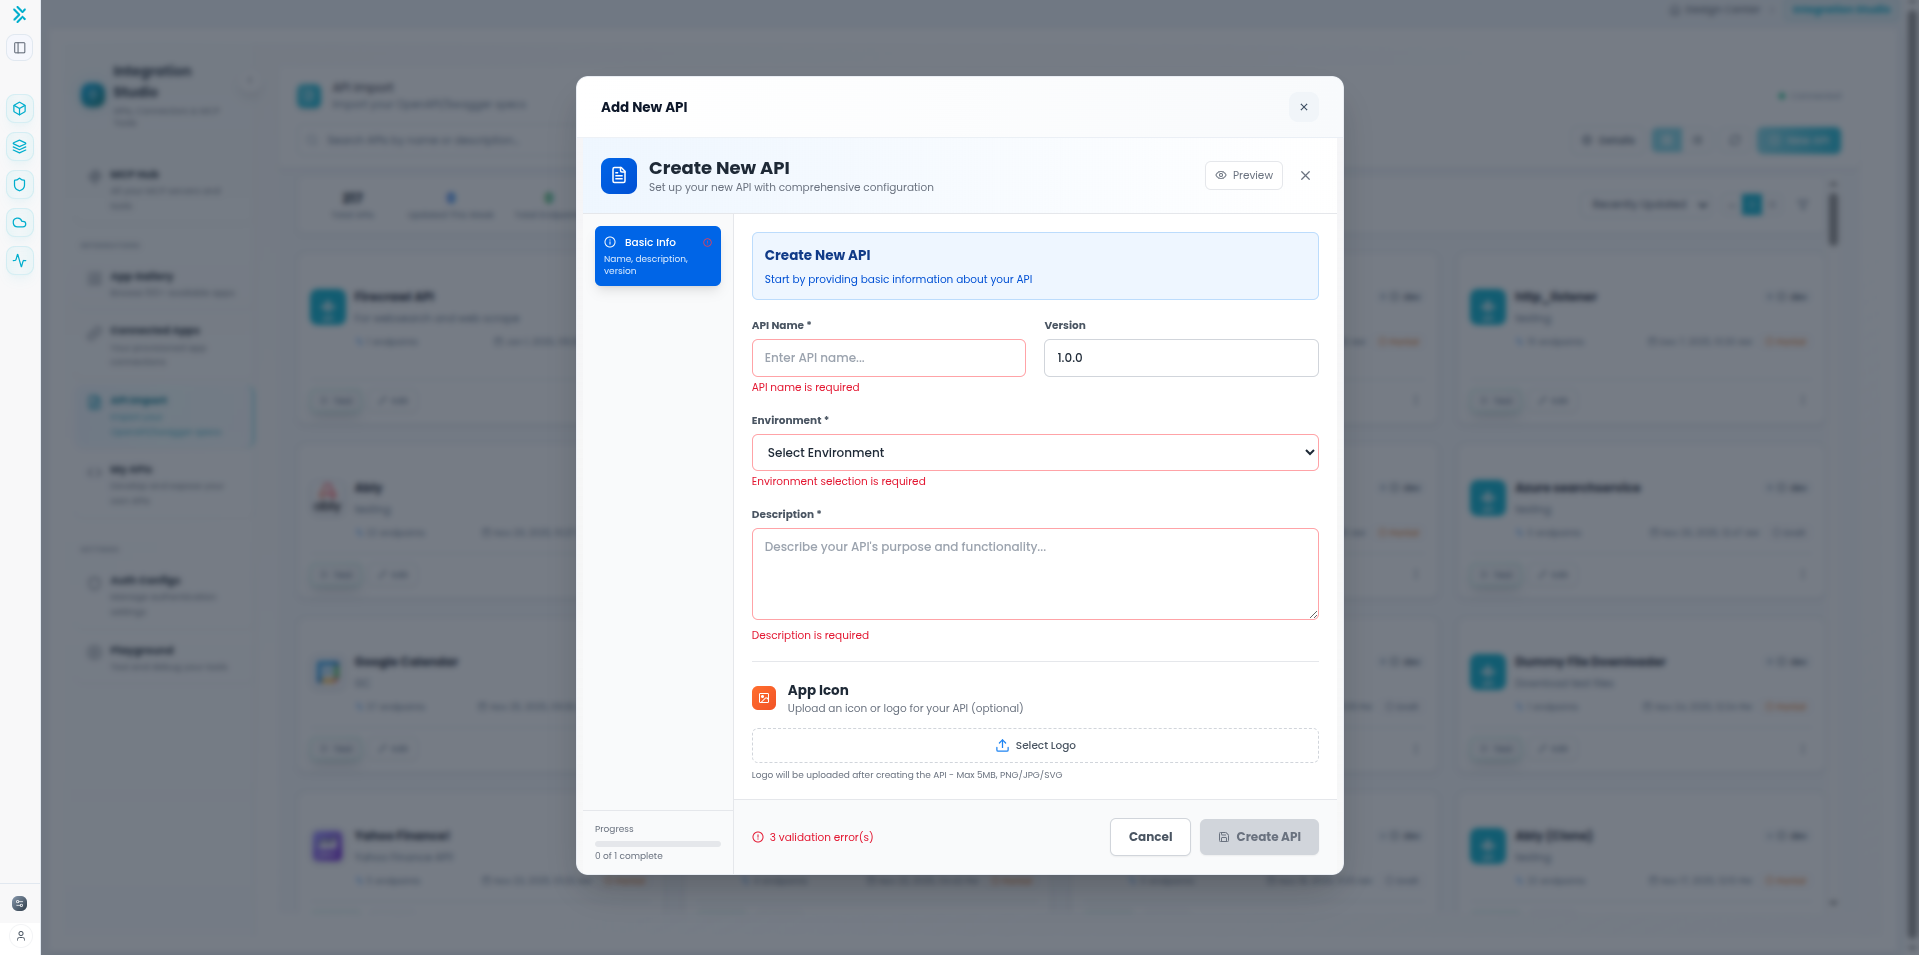
Step 1: Create New API
1
Navigate to API Import
Go to Integration Studio → API Import.
Click "New API" button to create a new API.
Provide a name for your API and create it.
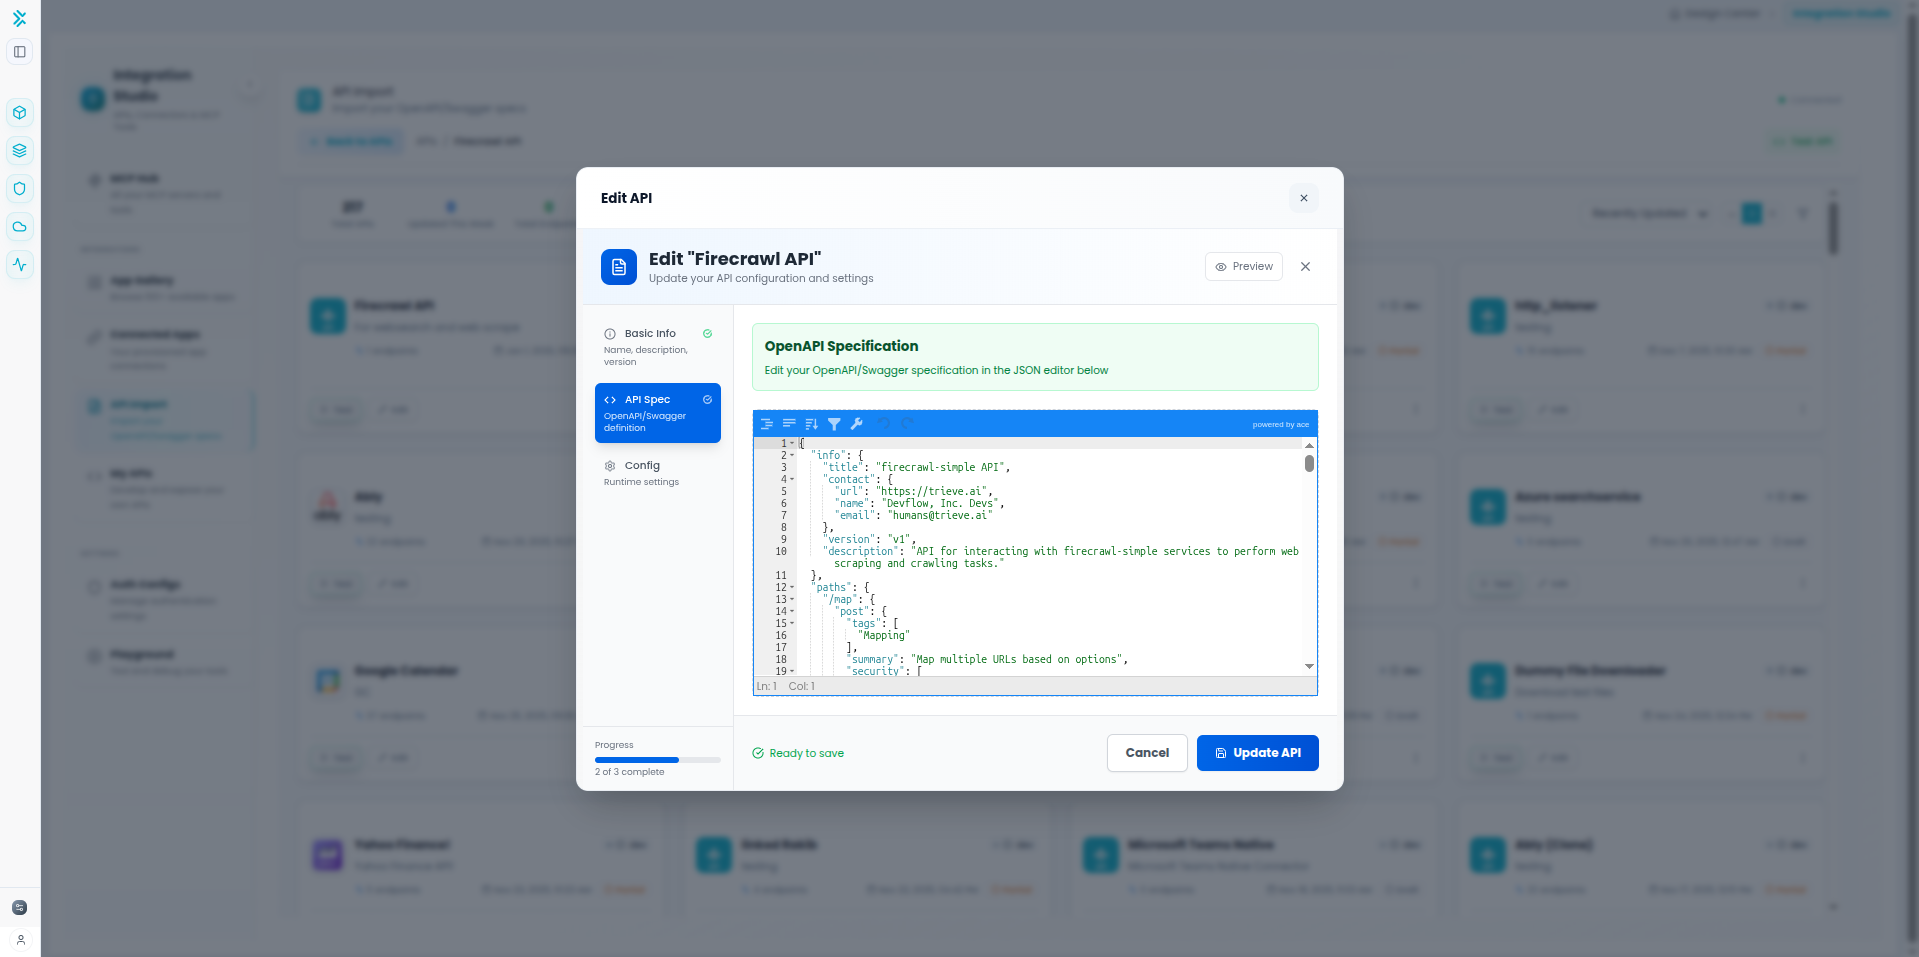
Step 2: Edit API and Paste OpenAPI Spec
2
Open JSON Editor and Paste Specification
After creating the API, click on the API card to view details, then click the Edit button. This opens a modal with a JSON editor.
In the JSON Editor Modal:
- Navigate to the "API Spec" section in the modal
- Copy your complete OpenAPI specification JSON
- Paste the entire OpenAPI spec into the JSON editor
- The editor validates the JSON format automatically
Step 3: Update API and Auto-Generate Tools
3
Update and Generate MCP Tools
Click the Update API button at the bottom of the modal. FlowGenX will:
- Parse the OpenAPI specification
- Auto-detect all endpoints and parameters
- Generate MCP tools for each endpoint
- Map authentication requirements from the spec
- Create tool schemas automatically
✨ Automatic Tool Generation
All endpoints from your OpenAPI spec are instantly converted to ready-to-use MCP tools with proper parameter schemas and descriptions.
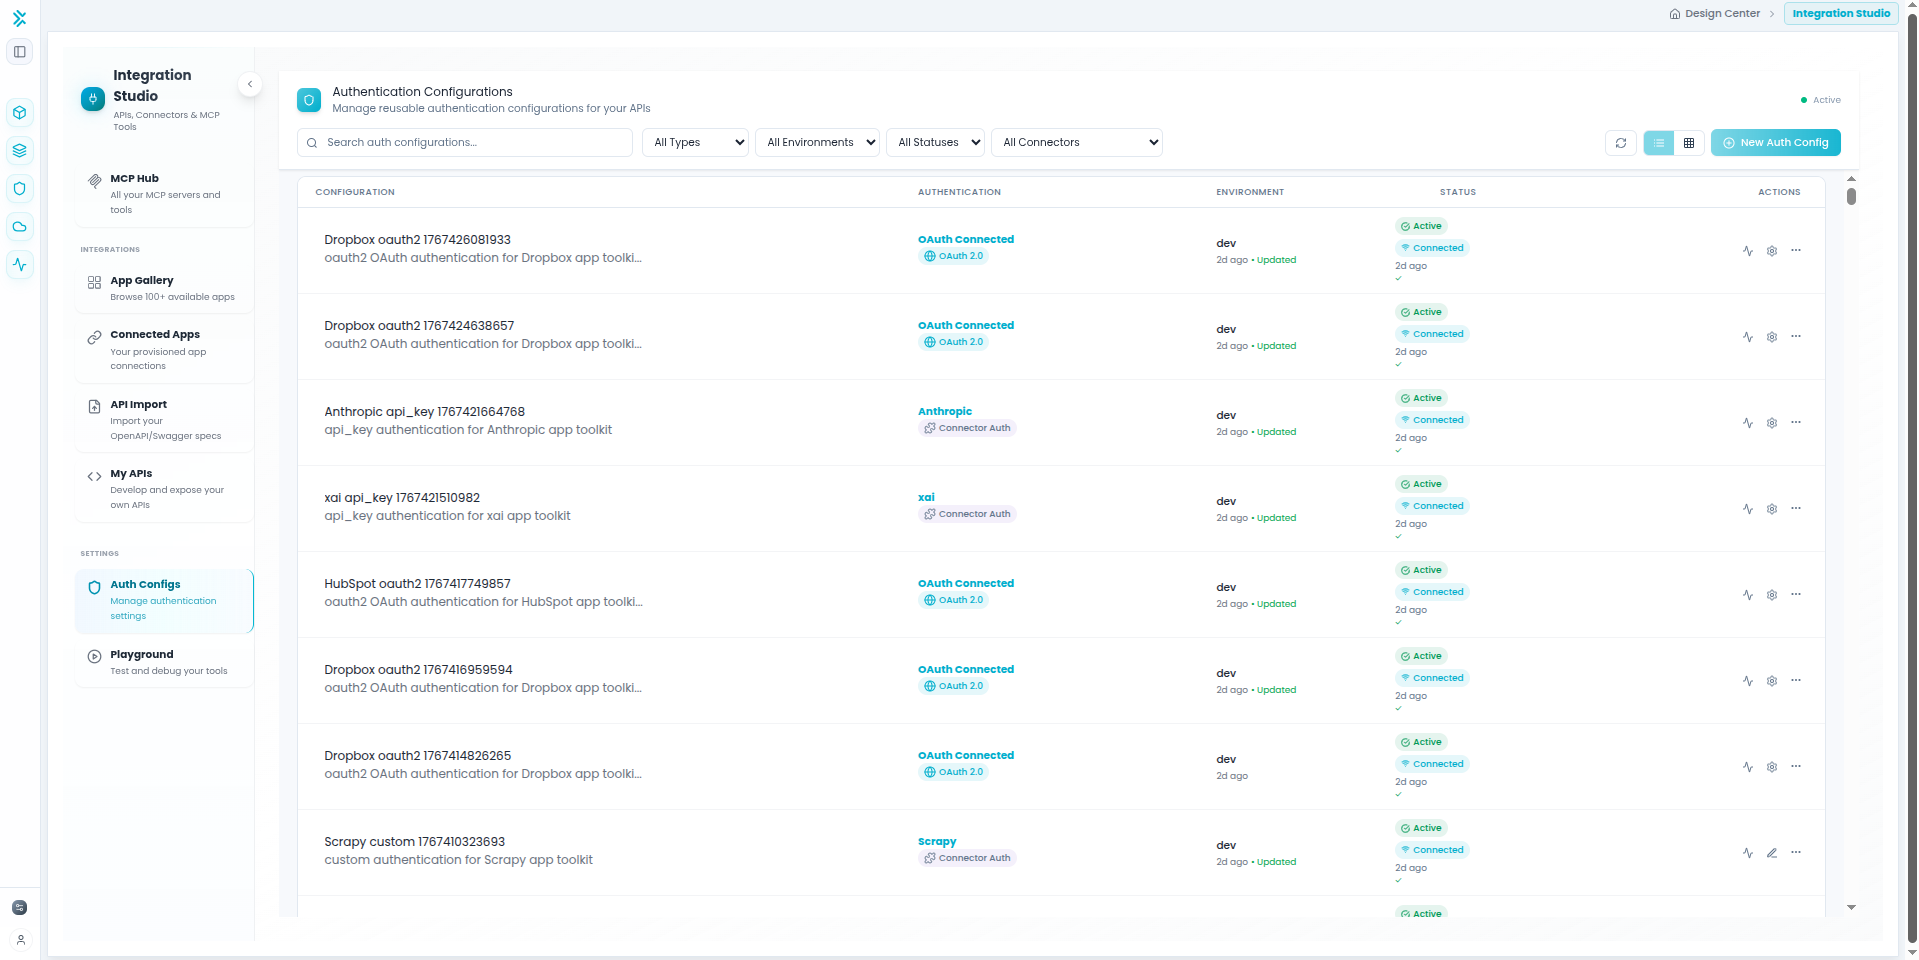
Step 4: Configure Authentication
4
Set Up Authentication
Navigate to Integration Studio → Auth Configs to configure authentication for your MCP server.
Authentication Setup:
- Go to Auth Configs page
- Click Create New auth configuration
- Select the appropriate authentication type for your API
- Fill in your credentials (API keys, tokens, OAuth details, etc.)
- Link this auth config to your MCP server
Pass key in header or query parameter
OAuth 2.0 access token in Authorization header
Username and password credentials
Full OAuth 2.0 flow with automatic token refresh
📚 For detailed information on authentication types and configuration, see the Auth Configs documentation.
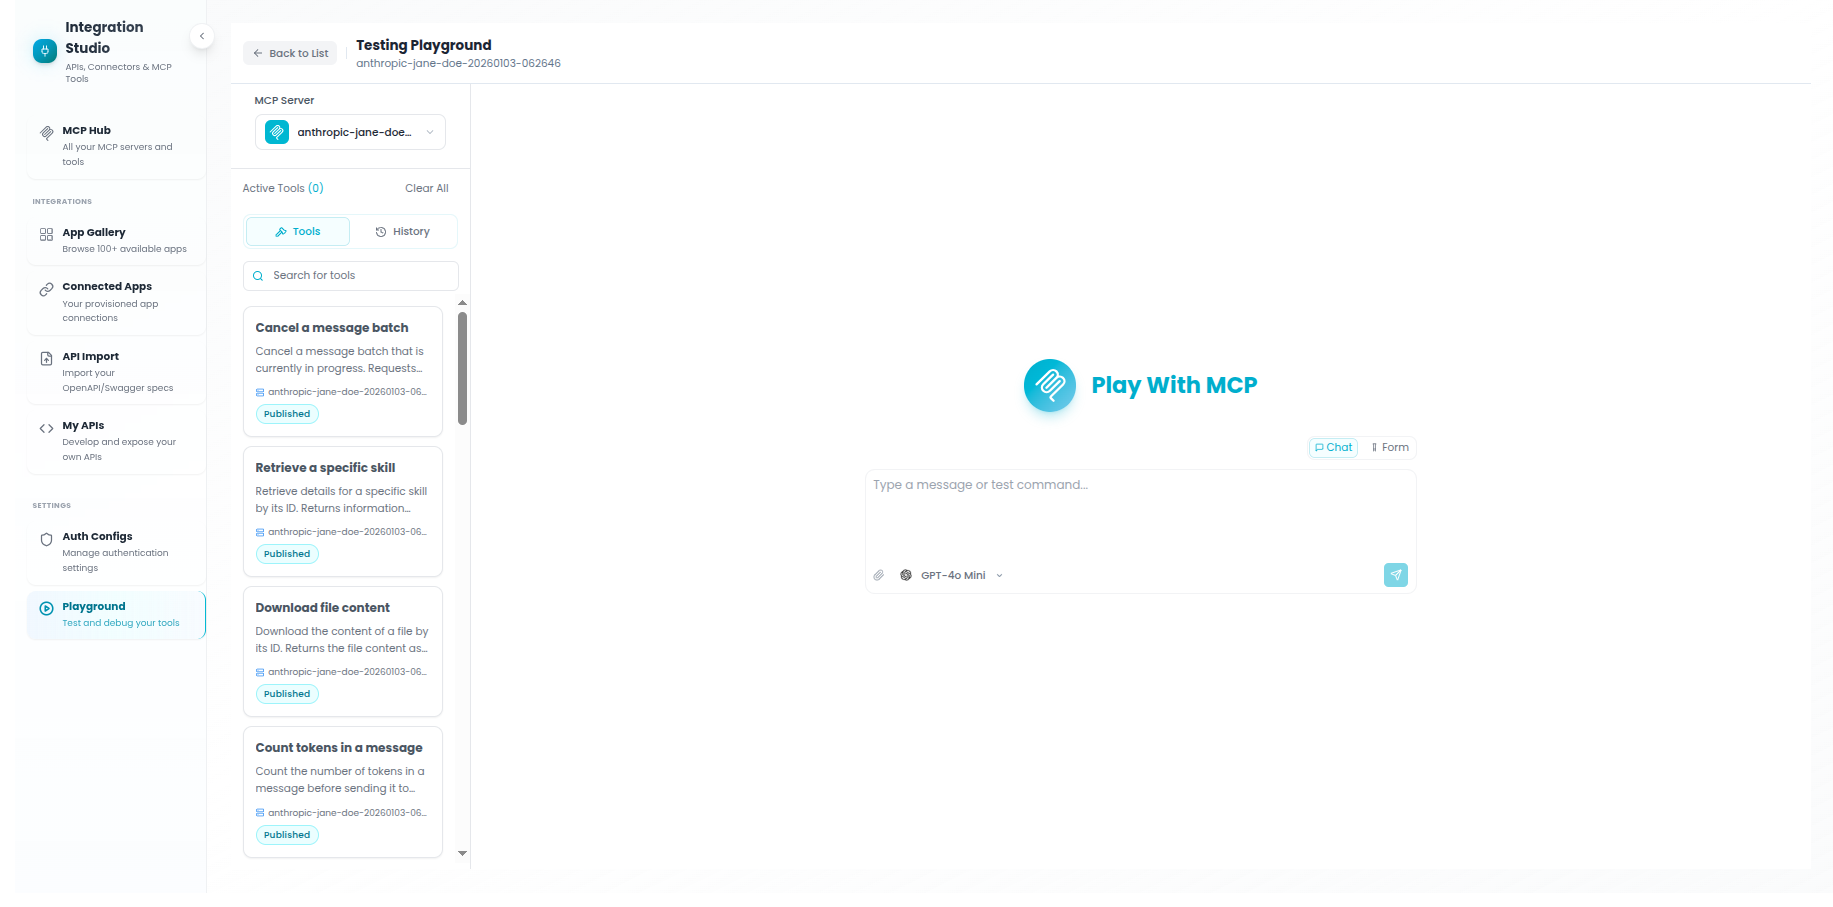
Step 5: Test Your MCP Tools
5
Test in MCP Playground
After configuring authentication, test your MCP tools in the interactive Playground environment.
Testing Workflow:
- Click Test in Playground button on your MCP server
- Select individual tools to test with custom parameters
- Review real-time execution results and traces
- Verify tools work correctly before using in agents or workflows
🎮 Learn more about testing MCP tools, chatting with agents, and debugging workflows in the MCP Playground documentation.
Best Practices
Tips for OpenAPI MCP Servers
- Use well-documented specs - APIs with good descriptions and examples produce better tool descriptions for agents.
- Filter out admin endpoints - Don't expose administrative or destructive operations unless necessary.
- Customize tool names - Rename auto-generated tools to be more descriptive and agent-friendly.
- Test authentication first - Verify your credentials work before importing all endpoints.
- Update regularly - Use the "Refresh Specification" feature to sync with API changes.
- Group related endpoints - Create separate MCP servers for different API domains (users, orders, inventory).