App Event Trigger
Trigger workflows automatically when events occur in your connected applications
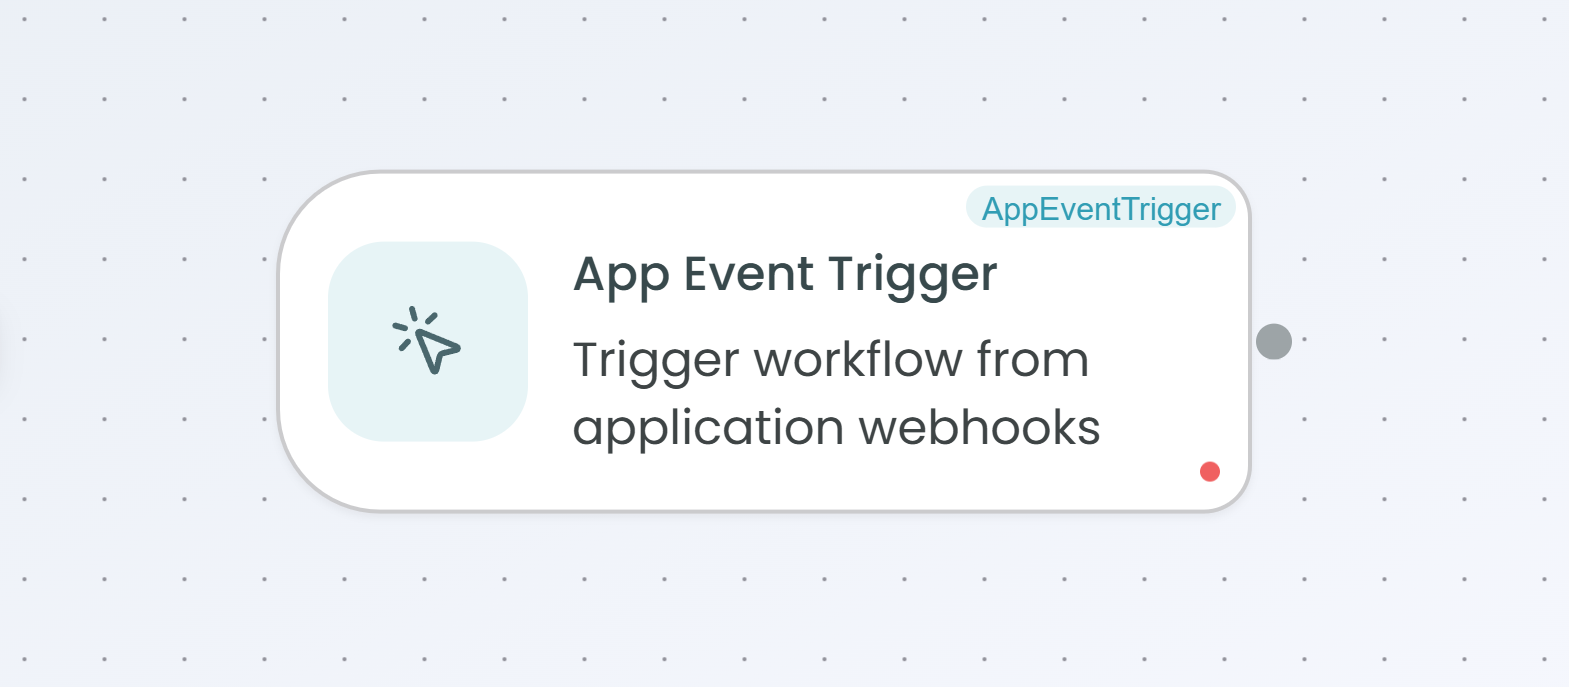
The App Event Trigger node allows you to automatically start workflows whenever specific events occur in your connected applications. This trigger listens for real-time events from platforms like HubSpot, Zendesk, Slack, Zoho, Jira, and Google Cloud Storage (GCS), eliminating the need for manual workflow execution.
Why Use App Event Trigger?
The App Event Trigger is ideal when you need to:
- Respond to customer actions instantly - Trigger workflows when a customer creates a ticket, sends a message, or updates their profile
- Automate cross-platform workflows - Connect events from one app to actions in another, creating seamless integrations
- Stay synchronized - Keep your systems in sync by reacting to changes in real-time
- Reduce manual work - Eliminate the need to constantly check for updates or manually start workflows
Supported Applications
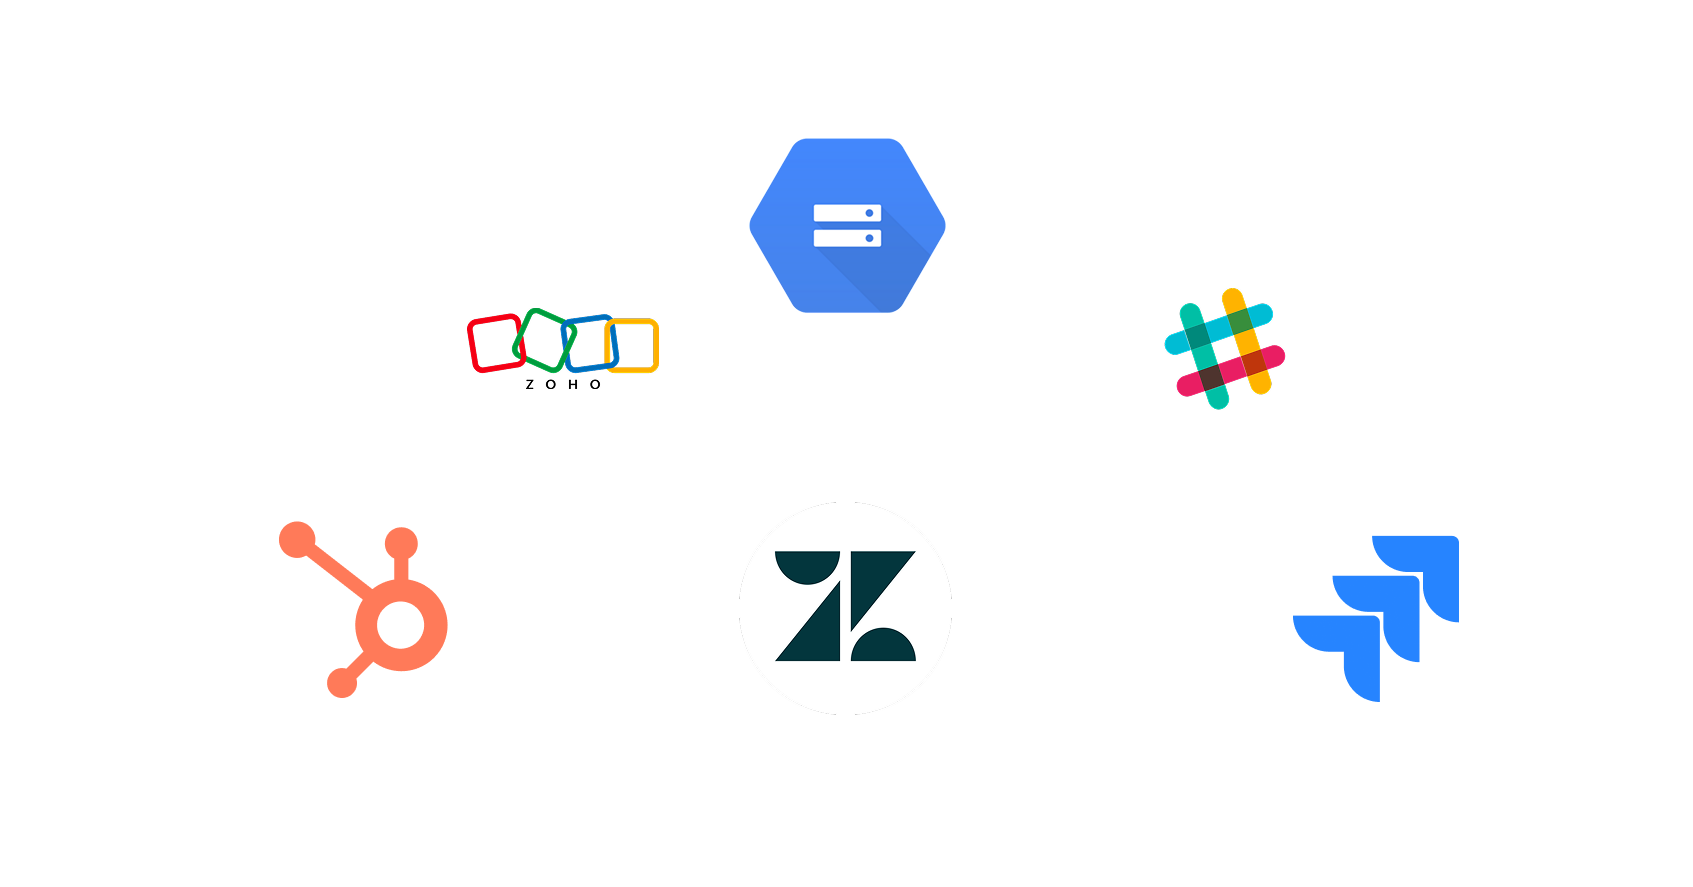
The App Event Trigger currently supports integration with:
- HubSpot - Marketing, sales, and service platform
- Zendesk - Customer service and support platform
- Slack - Application integration platform
- Zoho - Application integration platform
- Jira - Application integration platform
- GCS (Google Cloud Storage) - Cloud storage events
Configuration Steps
Setting up the App Event Trigger involves 5 simple steps. The configuration panel guides you through each step, showing your progress at the top.
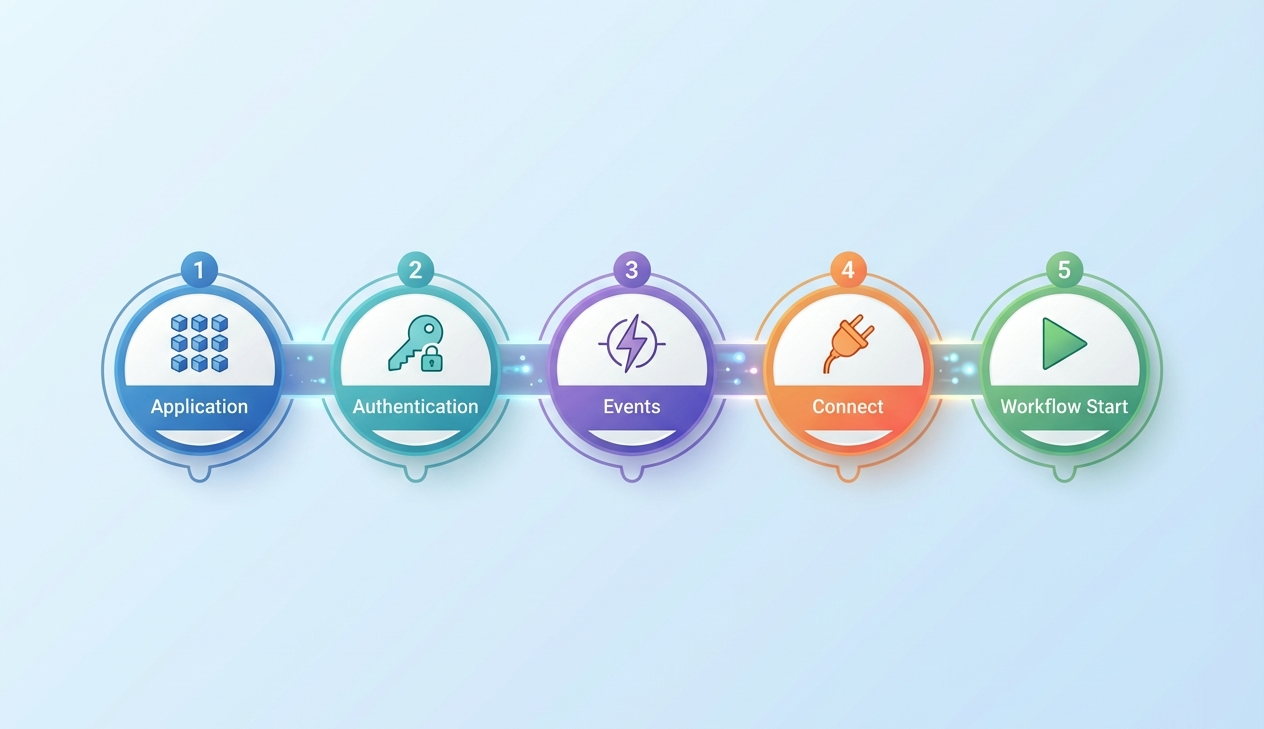
Step 1: Select Application
In this first step, you choose which application platform you want to integrate with your workflow.

How to select an application:
- Click on the Select Application dropdown
- Browse through the list of available applications or use the search bar to find your platform
- Click on your desired application (e.g., HubSpot, Zendesk, Slack)
- The application will be selected and marked with a checkmark
- Click Next to proceed to authentication
Each application in the list displays:
- Application icon for easy identification
- Application name
- Brief description of the platform
Step 2: Authentication
The authentication step allows you to securely connect FlowGenX to your selected application. The required credentials vary depending on the application you selected.
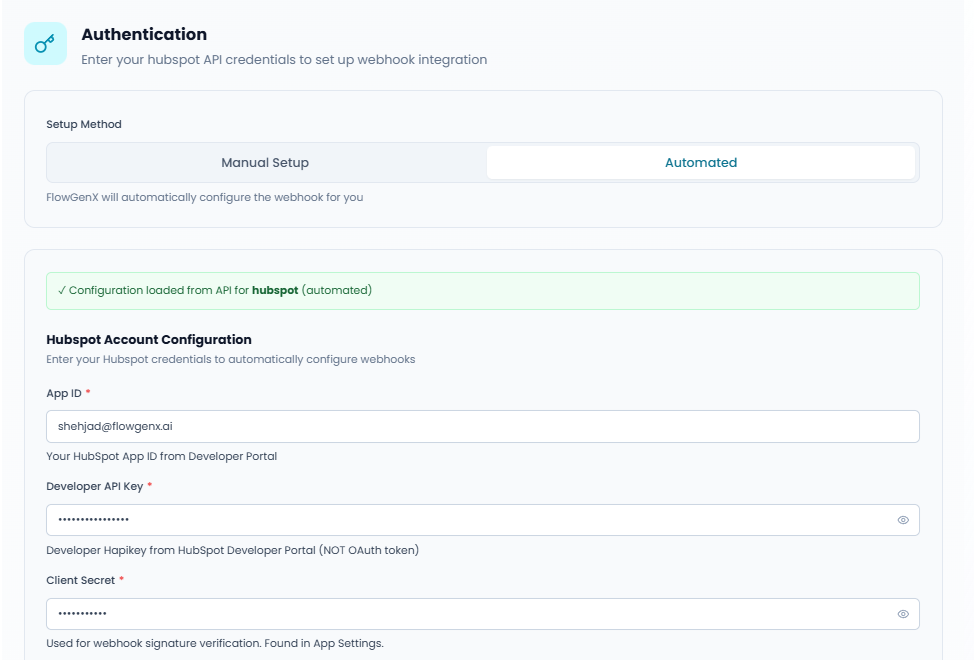
Authentication fields (example for HubSpot):
- Developer API Key - Your API key from the application's developer portal (NOT an OAuth token)
- Client Secret - Used for webhook signature verification, found in your app settings
- Portal ID (Optional) - Also known as Hub ID, optional for multi-portal setups
Advanced Configuration:
The advanced section provides additional options for experienced users:
- Webhook Name - Custom name for this webhook in your application (optional)
- Enable Automatic Retry - Automatically retry failed webhook deliveries
- Endpoint Configuration - Configure where external platforms send webhook events
- Base URL - Auto-generated based on your tenant, environment, selected application, and workflow name
- Path Segment - Custom path for the webhook endpoint (letters, numbers, underscores, hyphens only)
- API Key - API key for authenticating webhook requests (minimum 8 characters)
- Constructed Endpoint URL - The complete webhook URL that will be registered with the application
Important Notes:
- Keep your credentials secure and never share them
- The endpoint URL is automatically generated and will be used by the external application to send events
- You can find most credentials in your application's settings or developer portal
Click Next after entering all required credentials.
Step 3: Select Events
This step allows you to choose which specific events from the application should trigger your workflow.
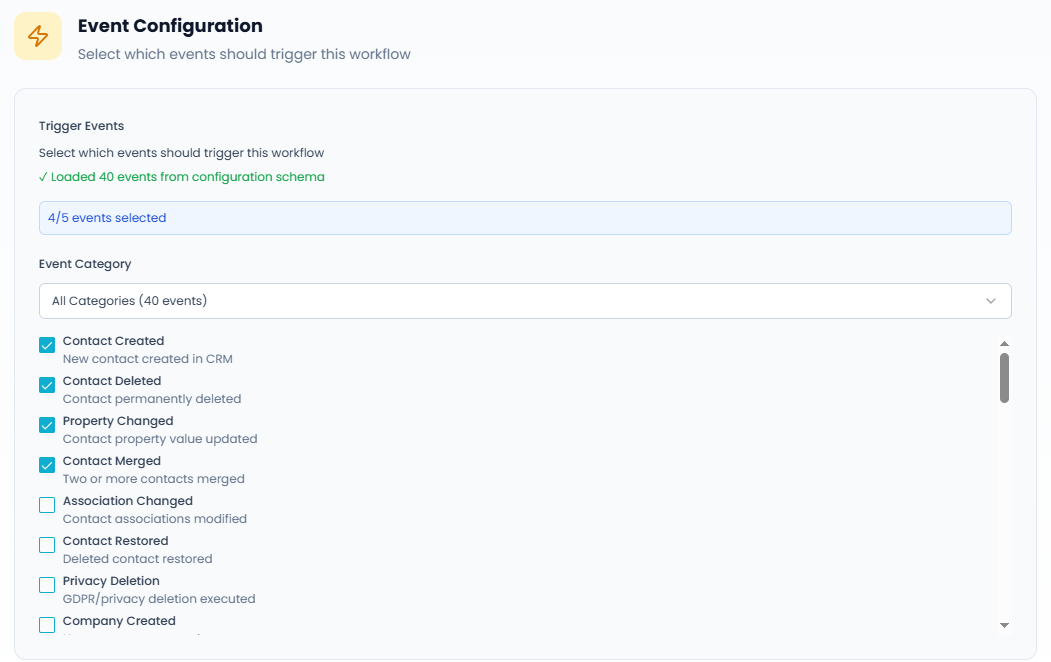
How to configure events:
- Review the message showing how many events were loaded from the configuration schema
- Use the Event Category dropdown to filter events by category (or view all categories)
- Browse through the available events
- Select the checkbox next to each event you want to monitor
Example events (for HubSpot):
- Contact Created - New contact created in CRM
- Contact Deleted - Contact permanently deleted
- Property Changed - Contact property value updated
- Contact Merged - Two or more contacts merged
- Association Changed - Contact associations modified
- Contact Restored - Deleted contact restored
- Privacy Deletion - GDPR/privacy deletion executed
- Company Created - New company record created
Each event displays:
- Event name
- Brief description of what triggers the event
The counter at the top shows how many events you've selected (e.g., "4/5 events selected").
Tip: Only select the events you actually need to monitor. Selecting too many events may create unnecessary workflow executions.
Click Next to proceed to the connection step.
Step 4: Setup Connection
In this step, the workflow automatically establishes the webhook connection with your selected application.
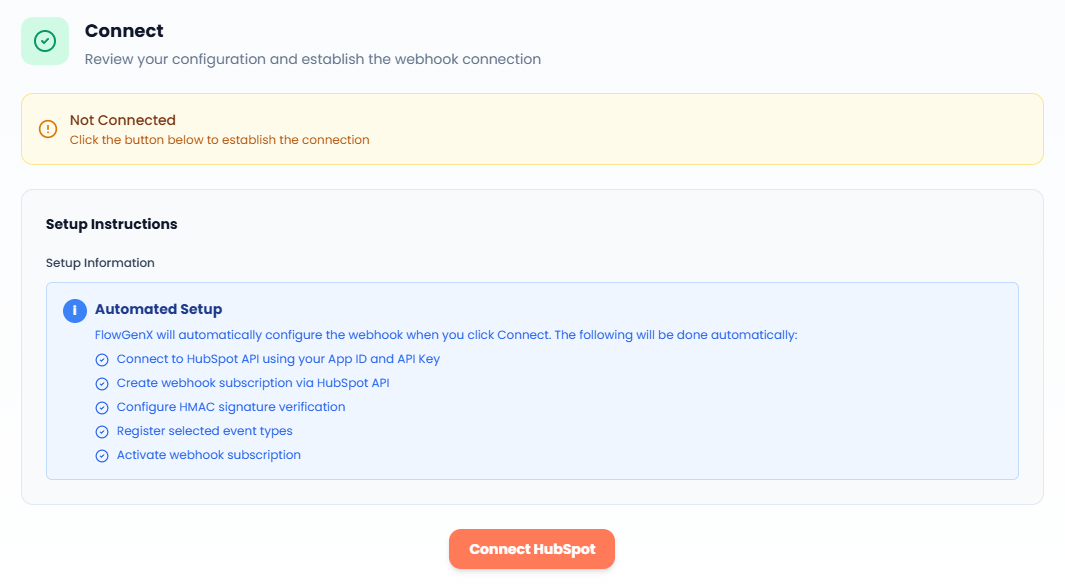
What happens during connection:
When you click the Connect button (e.g., "Connect HubSpot"), FlowGenX will automatically:
- Connect to the application's API using your App ID and API Key
- Create a webhook subscription via the application's API
- Configure HMAC signature verification for security
- Register the selected event types
- Activate the webhook subscription
The "Setup Instructions" panel shows you exactly what will be configured automatically, so you understand the process without needing to perform any manual steps.
Status indicators:
- Not Connected - The connection has not been established yet (shown with a warning banner)
- Connected - The webhook connection is active and ready to receive events
After clicking the connect button, wait for the connection to complete. Once successful, you'll see a confirmation and can proceed to the final step.
Click Next to move to testing and monitoring.
Step 5: Test & Monitor
The final step allows you to test your configuration and monitor incoming events in real-time.
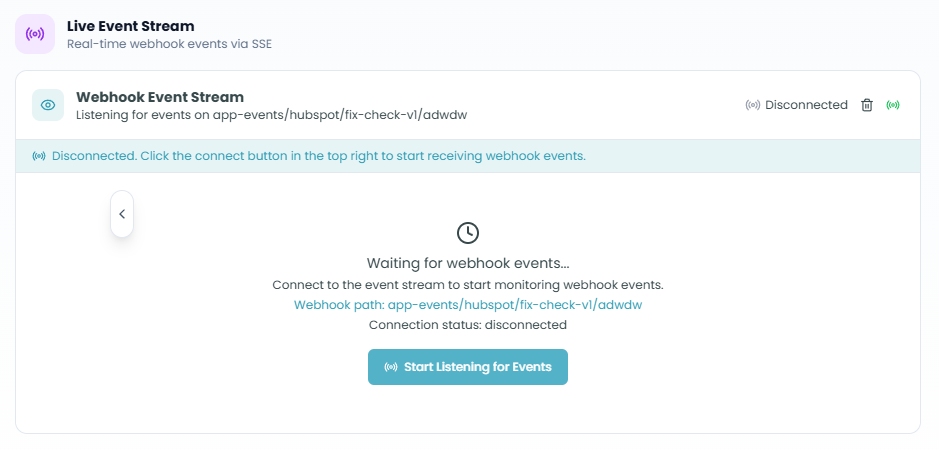
Live Event Stream:
This section displays real-time webhook events as they arrive from your connected application.
What you'll see:
- Connection Status - Shows whether the webhook is actively listening for events
- Endpoint Information - Displays the webhook endpoint URL that's receiving events
- Event Log - Real-time list of received events with timestamps
Example event entries:
- connected events - Confirmation that the connection is established
- message events - Actual webhook events from your application
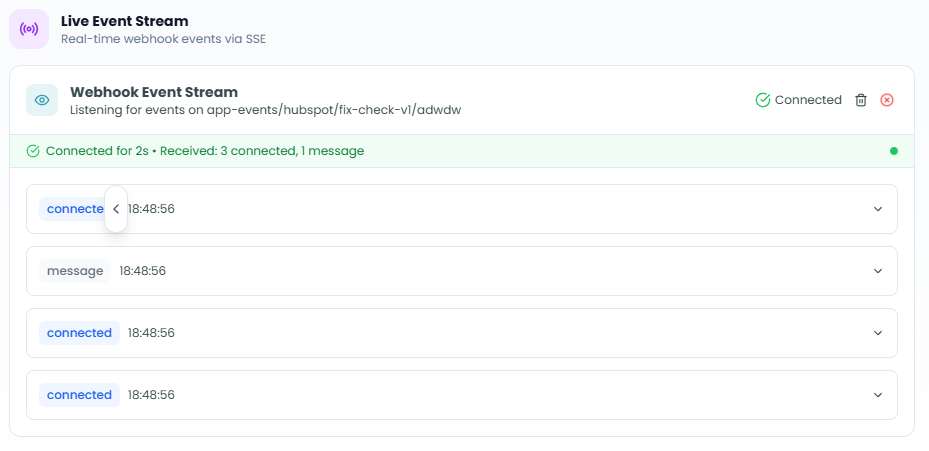
Each entry shows:
- Event type
- Timestamp (e.g., 18:15:37)
- Expandable details (click the arrow to view the complete event payload)
How to test:
- Ensure the connection status shows "Connected"
- Perform an action in your connected application that matches one of your selected events (e.g., create a contact in HubSpot)
- Watch the Live Event Stream for incoming events
- Expand an event to verify the data is correct
Connection duration:
The status message shows how long the connection has been active and how many events have been received (e.g., "Connected for 3s • Received: 3 connected, 1 message").
Once you've verified that events are being received correctly, click Complete to finish the configuration.
Using the App Event Trigger in Your Workflow
After configuration is complete:
- The App Event Trigger node will appear at the start of your workflow
- Whenever a selected event occurs in your connected application, the workflow will automatically execute
- The event data will be available to all subsequent nodes in the workflow
- You can access event details using the node's output data in downstream nodes
Best Practices
Selecting Events
- Be specific - Only select the events you actually need to avoid unnecessary workflow executions
- Group related events - If multiple events should trigger the same workflow, select all relevant events in one trigger
- Consider volume - Some events may occur very frequently (like property changes), so ensure your workflow can handle the load
Security
- Protect your credentials - Never share API keys or client secrets
- Use secure endpoints - The auto-generated endpoints include security features like API keys
- Regularly rotate keys - Update your API keys periodically for enhanced security
Testing
- Test before production - Always test your trigger with real events before deploying to production
- Monitor the event stream - Use the Live Event Stream to verify events are arriving as expected
- Check event payloads - Expand events to ensure you're receiving all the data you need
Troubleshooting
- Connection issues - Verify your API credentials are correct and have the necessary permissions
- No events received - Ensure you've selected the correct events and that they're actually occurring in your application
- Missing data - Check that your application is sending all required fields in the webhook payload
Monitoring Active Triggers
Once your workflow is deployed, you can monitor its execution:
- Navigate to the Event Driven Workflows section in Flow Management
- View all workflow runs triggered by your App Event Trigger
- Click on individual runs to see detailed execution information
- Use the replay feature to visualize how events flowed through your workflow
For more information on monitoring and debugging workflow executions, see the Traceability documentation.
Next Steps
After setting up your App Event Trigger:
- Add action nodes to process the incoming event data
- Use the event payload data in subsequent workflow steps
- Test the complete workflow with real events
- Deploy your workflow to start automating your processes
The App Event Trigger seamlessly connects your external applications to FlowGenX, enabling powerful event-driven automation without any manual intervention.